Showing posts with label Zig-zag. Show all posts

Sunday, 30 August 2009

Dinner Is Served!

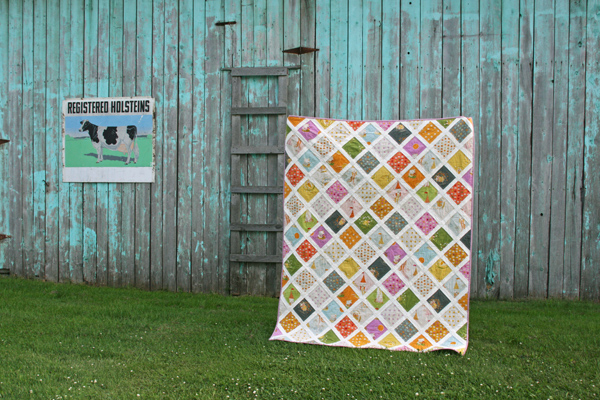
The cutlery baby quilt is finally finished. I really did drag the final border quilting on and on, but I'm happy with the final result:


I did an impromptu corner stone quilting after ripping out some very wonky free-hand flowers.

QUESTION FOR YOU:

Unfortunately, the ripped out stitches left little holes behind, so the flower-motif is still there - any tips on how to get those out????


I used this cute jungle/safari flanelette for the backing - I just love flanelette on baby quilt backs. I found this one in a fabric store in Montreal, Quebec.

Here are some of the animals close up, as well as the quilting look of the back:


And, I have one more question for you!

I spent seemingly forever knotting and sewing away the loose thread ends, sigh.


It was a flash back to the wedding bento box quilt - those threads almost made me late for the wedding! I actually started doing the back stitching at the start end end of each quilting line and just snipping the threads. Gasp! And that from me, the thread snob - I used to be so proud that you couldn't see where a seam started on my quilts. But I guess below it all, I'm plain lazy.

So, I'm wondering whether you are a snipper or a knotter/sewer - I guess this is a question for machine quilters only, as the patient hand-quilters among you don't have much of a choice, or do you?

Friday, 31 July 2009

Honoured

Crispy said such wonderful things about my quilting when she advertised my give-away (thanks for that!!!), I feel all gooey inside :) It really means so much to get such compliments from fellow quilters.

I love all the visitors coming to my blog and the comments that have been rolling in :) They all put a smile on my face!

In honour of Crispy, I don't want to disappoint any newcomers, so here's another quilting progress post:

I've been quilting away on the cutlery quilt, the center is done - hooray!


I thought long and hard about the type of quilting I wanted to do to flatten the strips in between the cutlery zigzag. In the end, the choice fell on the free-motion loopy-loops since I really like them. I want to try pebbles and grids soon, too.

In the end, I'm really happy with the popping zigzags, I hope it shows in the picture, because my view is biased of course since I see the quilt 3-D.


But hey, if you want to see it in 3-D, too, maybe a visit to PEI is in order. The island is supposed to be beautiful in the summer - so far, no one seems to have told Mr. or Mrs. Summer...

Thanks again for stopping by and I'm happy my give-away is working at least in some ways! (I tried to hide comments so the challenge would be a bit more of a challenge than reading the posted comments, but it didn't work... oops, didn't think that one through *grins*)

Thursday, 23 July 2009

On A Roll!

Holy moley! I basted and quilted the basic outlines on both baby quilts last night and sewed the top side of the binding on by this morning. I'm on a drive for these two quilts it seems!

I'll get them bound this weekend and decide on what kind of extra quilting - if any - I want for each quilt.

I've outlined the beige and starry blue border on the polar bear quilt and the panels really pop out since the batting on that quilt is fairly thick; on the cutlery quilt, I've outlined the red-brown cutlery zig-zag pattern going through the quilt and am considering an overall pattern to fill in the areas in between (pale green and blue) to make the zig-zag lines pop out. Maybe waves or loops... or maybe something more complicated for practice! I've drawn great inspiration from Diane Gaudinsky's blog (see my blog bar) and her breath-taking machine free-motion quilting.

Sorry, no pics today, but probably finished quilts next week :)

Wednesday, 22 July 2009

Two Baby Quilt Tops Done

I worked late last night because I really wanted to get these two baby quilt tops together.

Finished the border on the cutlery quilt:

I added a bit of yellow through the borders as the pale green made it look a bit too blah before.

And I also cut the borders for the polar bear quilt top and put the blocks together - familiar layout now, isn't it?


Here are a couple of the blocks in more detail...


I have the backings for both of these quilts cut out - flanelette for both - and have enough batting in the house, so I might even get both of these basted tonight. Yay for progress!

Tuesday, 12 May 2009

Truly Invisible!

I just wanted to show you how invisible the "invisible ladder stitch" is! See for yourself:
(I machine-sewed the binding to the front, then hand stitched on the back of the quilt)


Monday, 11 May 2009

Pink Zigzag Complete

I had the binding on this quilt done in no time! So small :)


I used the invisible ladder stitch that Mal and her mom presented on turning*turning. At first it went really slowly, but after half a side of the quilt, I was zooming along and it does look SOOOO much better! The binding looks the same front and back, it's amazing, and the stitches are just as secure as the whipping stitch. I highly recommend it!
I spaced my stitches 1/4" apart as I found this easiest to eyeball from all the seams I see all the time.


And here's the packaged quilt that travelled with me this weekend - I find that sheet set packages work really well to protect small quilts when traveling - it's such a nice sturdy plastic.

Friday, 8 May 2009

Pink Zigzag Almost Done!

Here's the progress I've made over the past week:

The top was pieced (I added some blocks/half blocks, because I couldn't use the triangle cut offs from one side to add to the other side as I didn't use the same colour for every second zigzag strip as CrazyMom did in her tutorial)

Edges cropped:

Backing taped to the floor - I picked a light pink cotton fabric with multi-sized and -coloured bubbles. The fabric has a relief, a bit waffled, I guess. I thought that'd be neat for a babyquilt that lies on the floor, and the last baby quilt I gave away is the same size and is usually folded in half to cover the baby, so the softer cotton top can be on both sides when the quilt is used as a blanket).

Batting and top added, and the whole sandwich pinned together - with a lot of pins, because I had to stretch the batting just a little bit - it was left over from another baby quilt.

Here it is quilted and trimmed, looks the same, no? There are close up photos below.

I was trying to come up with a different way of quilting this one other than free motion stippling. In the end, I went for that because a) I wanted to have smoother quilting to off-set the straight lines of the pattern, b) I'm away this weekend and want to do the binding, so I had to get it done quickly and free motion is fast.

I did the loopy-loops along the first border - I used them on the vampire quilt too and really like the look. As you can see, I also used, ah, what's that thread called again? Where the colours change. Oh well. You know what I mean... I'm having a blackout here.

I've used this type of thread once before, on the owl quilt, but this time I really noticed that it shows a lot whenever the backthread comes through a bit. Last time I was at the shop, the repair guy was in such a rush, he yanked the thread out the wrong way so quickly, that he actually screwed up my tension settings. I've tried to remember what it was set on - it's one of those set and forget things... Don't know if I didn't get it quite right, or if the waffle material on the back was to blame - it does act differently than normal quilting cotton.

Straight lines for the outer border again, it was getting very late, past midnight, in fact.


You can see the waffle pattern on the fabric here:


I've got the binding (pieced from left over 2" strips, it'll be very very tight binding, since I fold it) ready to go, so it should be a quilt-finishing weekend!

Monday, 4 May 2009

Pink Quilt - 1st border and some offspring

Here it is, joined, ironed, and has the first, tiny 3/4" border. I'm buying some more of the solid magenta material for a 2.5-3" border, then it'll probably be binding time, because basically I'm pinked out... [really, it is ironed, it's just crumpled because of limited floor space in the quilt room... the living room floor was covered in other quilting stuff]

[looking at the last post about this quilt, the picture with the squares laid out on the floor actually looks better than this one, oops ;) ]


I say all pinked out... except for this little offspring quilt from the left overs, using AmandaJean's/CrazyMomQuilt's tutorial for no-triangles-zig-zag quilts. I still need a few more pieces, but have started to join some strip-pairs.