Showing posts with label Free Motion. Show all posts

Wednesday, 8 April 2015

Progress on the plus-quilt

(Linking up to WIP Wednesday today :-)

Inspiration struck me, and I grabbed it by the neck and wrung a quiltbacking for the Pluses Galore Quilt out of it :-) I came up with this echo pattern of the plus theme, using a leftover block I had made by accident.
So here you have the finished back...


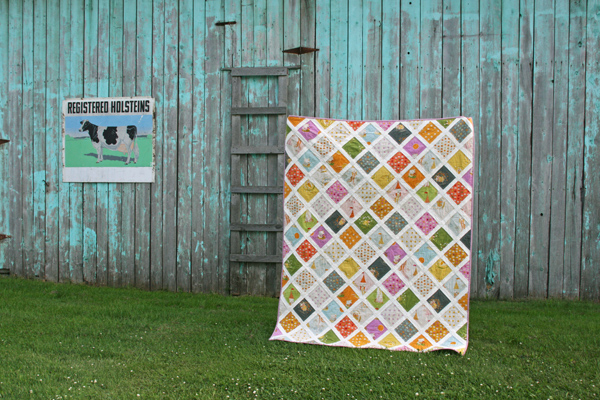
... and the finished front. Right now it's about 71"x85".


Here it is pin basted and ready for quilting.


Have you noticed the odd thing about it? I basted it with the backing face up. Simple reason for this: I had no clue how to quilt it based on the front, but the back inspired me to do echo quilting around the plus shape!

Here is what the echo quilting looked like. Note the tense... Yup, I hated it. But I kept going. Don't quilt with a deadline, it sucks! The quilting did not grow on me. 


Yes, you guessed it. I'm undoing it all and have switched to mussel shell quilting. This feels right. I'm quilting it from the front now. Just make taking out the pins a bit trickier... My guess is that I'm about 2/3 to 3/4 done. Hard to tell under my 33 year-old Singer :-) everything is bunched up right now...

Wednesday, 4 February 2015

Warm and fuzzy corners

I've decided on a design for the corner triangles of the Warm and Fuzzy quilt.


I've also finished the binding and did a single line of hand-quilting in the middle of the black border (it's a bit wobbly at times, but I did it spontaneously while visiting my grandma in hospital, so it's connected to a personal story for me and not a flaw).

With all that, I now declare this quilt... finished!
And once the sun comes out, I'll take some photos of the entire quilt!

Saturday, 10 January 2015

Galactic finish

These were actually done ages ago, this past summer. But alas, time flies, and too little of it is used for blogging :)

I have some semi-finished plans to give two of these away instead of hanging them as a triplet wall-hanging. We'll see if these plans pan out. Enjoy these photos of the quilting. It was so much fun making these and playing around with free-motion quilting.


They finish at 16.5 x 22".

Monday, 5 January 2015

Fabric bins

I used this easy tutorial to make my very first fabric bin. 


Since I couldn't find my iron-on lining stabilizer stuff (Pellon-equivakent), I used batting and quilted all over the place. It's not super sturdy, but I don't have any comparison of what it would be like with the Pellon... and it stands up without problem, so the bin works for me.

Now I gotta figure out what to put inside... :-)

Sunday, 28 December 2014

Tea Time

Today I am sharing a commissioned work with you. It's a cover for a lidded stove, 2 by 2 feet finished size. The lady who ordered it provided the fabric (which is not quilting weight cotton but a heavy cotton weave --- this made it tricky to work with, because it frayed terribly, but it was lovely and smooth to quilt). She wanted a kitchen theme on the cover.

I started by browsing the internet for tea cup and a tea pot shape, which I printed and traced onto thin paper. I then cut out blue fabric in those shapes and used a zigzag stitch around the edges to apply the shapes to the quilt top.


I quilted the details from the tracing paper with contrasting thread. This gave the shapes some nice dimensionality, too.


To make things easier, I did not cut the thread till the end and just hopped from spot to spot.


Here's a view of the back.


I quilted some steam coming out of the tea pot (the first layer was in matching beige thread, but you can just make it out here.


With the same beige thread, I filled the background. I thought about tearing out some of the wavy lines right down the center and redoing them to get better perspective, but in the end, it was not worth the effort, so I left it this way.


I added some blue thread to emphasize the steam coming out of the tea pot and used proper quilting weight cotton in matching blue for the binding (just attached to the front in this shot).


Here it is all sewn down by hand (possibly my favourite part of quilting)...


And here's the back, including the label, of course!


It was a fun little project, though I once again noticed that I prefer non-commissioned work. I can do what I want without wondering whether the customer will like it, and there's no deadline!

Sunday, 8 June 2014

Almost there

Yay, these 3 are almost done! Just the binding to sew down, and tada!


I'm really excited about the quilting. Each of the quilts has different free-motion quilting on it. This one for example has spider webs in the circles. I am considering embroidering a big fat purple spider on this one ;) Still to be decided...


I did a fantasy pattern of waves and loops in the background. It's a bit much, but I'm getting used to it.


Sometimes, the batiks didn't flow into each other since I was limited by the fabrics in the charm pack. I happened to find binding fabric that matched the hues pretty well. In some cases, I attached the binding strips with straight instead of diagonal seams to match the fabrics on the quilt, like here:


The hand-sewing part of the binding is one of my favourite steps, so I'm quite looking forward to these 3 light weights on my lap while I'm stitching away! I have not attached hanging tubes on the back yet, since I couldn't decide which direction to hang them up in. I might just attached some small loops in the corners to keep the options open.


Saturday, 19 April 2014

iPad cover

I used some of my treasured fabric from the magnolia series to make an iPad cover. After my last experience making one for a friend (the iPad cover kept being too small, despite my careful measuring...), I added even more to my measurements. And it still came out tight! Argh! But, it fit, and with time it will probably stretch a bit.

Instead of quilting a pattern, I free-motion outlined the flowers and stems. I didn't use any basting pins, and the batting shifted a bit by the times I reached the other end, but the problem was solvable with a bit of pulling and stretching.


I'm getting to be a pro at doing lined, reversible (i.e. no raw edges visible) pouches, so I'm skipping all the layering and turning steps. Here's the final cover:


I decided a gainst velcro this time (I've noticed on my cellphone cover that the velcro does not hold the pouch shut after a while of frequent use) and want to use buttons instead. That's what the loops are for. I'm still looking for two light coloured buttons to attach.


iLike :-)

Friday, 4 April 2014

Quilting Warm and Fuzzy

I've nearly completed the quilting on the Warm & Fuzzy quilt. First, I quilted around all the log-cabin diamonds by doing different kinds of loops every few strips (outlining 3 squares in each block) and free-motion quilting around the shapes in the focus-fabric in the middle. (There's a photo of the back below, where you can see the quilting better.)


I have a soft spot for feathers, so decided to make a feather circle in the center of each solid diamond, similar to the this quilt I raffled off to raise money for Doctors Without Borders in 2011.


The blocks on the Warm & Fuzzy quilt are quite a bit bigger, so I made my own template. I only made a quarter and pinned it to the quilt with a sewing pin, rotating it to mark all 4 quarters. It worked well :)


In the solid triangles around the outside, I also quilted feathers, mostly free-hand for a less rigid look. I just chalked out 3 wavy lines and feathered along them. My feathers changed quite a bit between the first and last triangle (I was trying different techniques), but since I quilted tone-on-tone, it's not very noticable. To fill the empty space between the 3 feathers, I added a flower on each side.


Here you can see the quilting around the log-cabin diamonds a bit better:

I like tone-on-tone quilting. One day I will tackle a whole-cloth quilt in white. I love the effect of intricate free-motion quilting on white fabric! I have been looking at a lot of Diane Gaudynski's work, which is gorgeous.


And here's the almost complete top. I am currently deciding whether to quilte the border in burgundy or black on black. And what to quilt in the border. And what colour to use for binding... The black border is a bit oppressive, now that I look at it in this photo. What do you think?