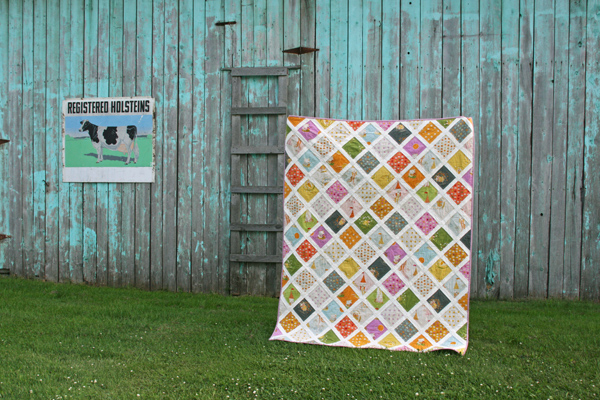
Here's how I did it:
I started with a fat quarter package containing 8 fat quarters from the Timeless Treasures series. I picked unbleached cotton for the background. Cut 4 3/8" (=4.375") squares for the half square triangles.
For the background, cut 24 [4"] squares and 36 [4 3/8"] squares.
Of the six wheely fabrics, cut 4 [4 3/8"] squares each.
Of the center squares fabric, cut 4 [4 3/8"] squares.
Of the triangle-around-the-edge fabric, cut 8 [4 3/8"] squares.
This should give you 36 colour [4 3/8"] squares and 36 unbleached cotton [4 3/8"] squares.
 Mark two diagonal lines on the unbleached cotton [4 3/8"] squares, each 1/4" from the center diagonal. Pin these marked squares to all the pattern fabrics, right sides together (marked side up on the unbleached cotton).
Sew together along the lines.
 Cut each square in half between the seams.

Press the seams.

Trim the corner overhang.

Lay out your wheelies like this and start sewing squares together.


Decide on a final layout and sew blocks into rows and rows together to complete the quilt top.

Measure your quilt (it's around 28x42") and add 1-2" on all sides for the backing fabric. I used left over pieces from the top and made a strip to divide the solid backing fabric.
 Decide on your binding colour and cut enough 2" strips to go around the edge of the quilt plus about 16" for corners and the end joint. 2" makes a tight binding, feel free to use 2 1/4" or 2 1/2" if you're more comfortable with that. Join the strip on the diagonal (sorry, no pics) - basically, lay the ends of two strips perpendicularly on top of each other so that they form a corner, sew diagonally across so that when you lay the seam out flat, you have a straight strip. If you lay your strips out like an L-shape, the diagonal seam goes top right to bottom left.
Tape or pin the quilt backing to the floor face down, make sure it's flat and taught, but not stretched. Cut batting to the size of the backing, at least 1-2" bigger than the quilt top, smoothe it out on the backing fabric and add your quilt top. Pin from the middle out, to each side, to the top and bottom, to each corner, then fill in the slices in between with pins, always from the middle out. Keep smoothing out your quilt top as you go along and make sure it stays on straight, not pulled and warped. Pin every 4" or so, your hand should hit at least one pin wherever you place it on the quilt.
 Quilt to your liking, by hand or machine. I use an old Singer machine, it does straight and zigzag stitches, very simple. Using a walking foot that moves fabric from the top and the bottom to avoid pulling only the bottom fabric, I roughly outlined the wheelies and squares/triangles in the center and along the edge.
Then I used a darning foot (with the feed dogs lowered, in my case, removed) to stipple the background.

Here's the result on the back:


And the front:


 I used the walking foot to sew the binding along the cut edge to the top of the quilt, mitre-folding the corners, and hand-sewing it to the back, of course using the invisible ladder stitch, my all-time-favourite.
Voila!


.JPG)