Friday, 16 July 2010

Leftover Options


Thanks for all your suggestions/votes for the Wonderland Leftover HSTs the other day!

Seemed everyone liked a different layout :)

I've found a totally different layout in the Connecting Threads magazine I get in the mail. I think I ordered from them once or signed up for a newsletter and am getting this magazine now. It's fun to browse through for pattern ideas. Anyway, I'll need to collect a whole bunch more HSTs for whichever layout I choose, so there's another project moved to the back-burner! :)

Just a heads up that it'll be truly quiet here for a week or two. Come back in late July for an update :)

By the way, if "Karen in Pennsylvania" reads this - I appreciate your comments and have been trying to reply to them but don't have any way to contact you - you don't have a profile and there's no reply address. So if you'd like to get replies, let me know you're email!

Wednesday, 14 July 2010

What's New?

Well, apart from the Monkey Mechanic quilt, quilting action has been slow around here.

I'm working away on the Hoot Hoot Owl applique.


Here I'm attaching the branches. After the first branch came out a bit wavy, I basted the second branch on first and then I appliqued it on. I think you're supposed to do that sometimes anyway, I just forgot. A few more stitches on the branch and then that quilt is ready for basting and (machine)quilting.


I've also been quilting on the Love U in Green quilt. Great little project to take to my bee meetings (we've met twice so far, it's fun!). I decided on concentric squares and like the effect quite a lot. As you can see, I've got a bit of attention deficit going on, as I can't seem to finish a square before starting the next one, so I have several on the go, in various stages of completion :)


I'm also on the final touches of the Imagination 1 quilting, here's a sneak preview:

The Border:
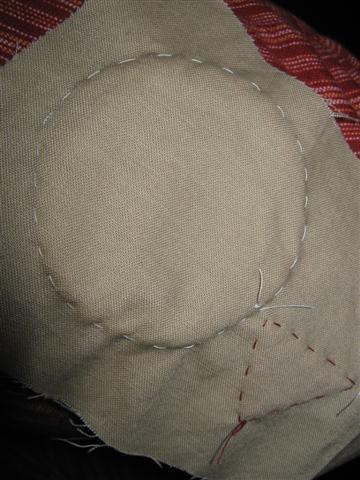
Some of the circle quilting:

Unfortunately, it's been much too hot to hand-quilt these past few days, and the soccer world cup demanded some attention as well, but now that all that is over, I'll get back to stitching :)

Oh, and some of you had wondered about the border on the WonderChain quilt, this is the stencil I used for it. I really liked working with stencils. I've tried free-hand hand-quilting before, as well as free-hand drawing a pattern on, and it just doesn't look as good as a stencil in terms of uniformity. I have a small collection of stencils now and will certainly use them again!

Sunday, 11 July 2010

How Could This Happen???

Okay, so I labelled all my diagonal rows and joined the brown and the green blocks one by one, walking back and forth to the machine because I was worried of mixing up blocks. I did well, no? Monkey Mechanic all put together, looks great, no?

So I made a backing, fairly simple...

Got to basting - I have hardwood floors, so I use masking tape. I hate wasting stuff, so I re-use the bits until they don't stick anymore... I just tape them back on the roll when I'm done - do you re-use your masking tape???


I was out of cotton batting but found a bunch of poly batting that's been waiting to be used up.

And then I started quilting - a very cool pattern, too (I'll show you later).

All went smoothly until I got to this corner. Looks odd, somehow, didn't it? Go back to the top of this post and check out the full quilt and see how long it takes you to notice.

Did any of you spot the mistake in the first photo??? Let me know!!!

I find it hard to spot when you see more than one section of the quilt, but it's a big enough mistake that I didn't want to leave it. Argh, a whole block to rotate!!! Out came the seam ripper.


Here's the same section with the block rotated properly. Are all the little hairs on the back of your neck flattening down again? It just felt wrong before the correction of the block position!


Don't ask me how, but I somehow managed to take out enough basting pins to sew the square back in by machine - the hand-sewing had seemed daunting and I didn't want to applique because the fabric underneath wasn't solid of course, just a 1/4 strip to sew on to.


Here's the block sewed back in. It's not perfect, especially since I couldn't iron the seams flat, and I have a bit of a bump in one corner, but I'll just quilt that flat, no problemo!


And to end on a positive note: here's the quilting I've done so far (all the green is done now, I'm picking a pattern for the brown right now) - I'm loving the effect, and wait till I show you the backing!! (another post ;)


Polyester batting sure make a quilt fluffy!

Friday, 9 July 2010

Mossy Monkey Mechanic


I printed this pattern for a monkey wrench block out AGES ago! Literally within months of starting this blog, which does feel like ages ago :) Well, 273 posts could be ages ago, eh?

I really like the effect of this pattern - rounded shapes with straight-edged pieces, excellent :)

I did a bit of adapting because I didn't agree with the measurements in the pattern - some of the triangles were much too big - I like to avoid cropping when I can and just have the triangles 'fit' to begin with.

I made a test block - yes, I totally learned from that darn cat quilt project that's still 'abandoned' because I cut all the pieces and then realized I miscalculated! - it's in the top left corner of this pictures and worked out well.


So I went ahead and cut out pretty much all the shapes using one brown background fabric and various greens. As I mentioned previously, I've accumulated quite a big green stash and it's time to use some of it up...

... so I can buy more, harharhar!

I decided to build the quilt up slightly different, by making 3 types of blocks. A solid brown one (8" square), a green one made up of 4 green triangles (triangles made from 6" squares), and this pieced block (which is a monkey wrench minus one layer of triangles):


So I got to mass-producing my 30 blocks...


Look at the brown green houses ;)


I carefully avoided having two of the same greens touching in a block. The complete monkey wrench block in this picture was one of my practice blocks.


Truly mass-produced...


Here's my final layout, now you can really see the pattern!


If you want to make this quilt:

For a 5x6 block layout (approx 12" blocks for a quilt ~60"x70"), you need the following:

BROWN:
60 - 2.5" squares
30 - 3.5" squares (cut diagonally to get 60 triangles)
30 - 4.5" squares (cut diagonally to get 60 triangles)
10 - 8" squares (leave whole)
9 - triangles (cut from 8" squares)
2 - triangles (cut from 6" square)

GREEN:
60 - 2.5" squares
30 - 3.5" squares (cut diagonally to get 60 triangles)
30 - 4.5" squares (cut diagonally to get 60 triangles)
30 - 6" squares squares (cut diagonally to get 60 triangles)

Wednesday, 7 July 2010

Wonderland Leftovers

Well, I'll start with the non-left overs! My fabric orders have arrived, so I know have a treasure trove of Wonderland fabric (and some other Moda prints, mostly from the Freebird series):

Don't you love how Buttercuppity packaged the yards??? So cute and done with so much love, that was a really nice touch!


Back to the leftovers: I had a few charm squares left over after making the Wonder Chain baby quilt, and they've just been lying around until one day I decided to turn them into HSTs with gray background fabric.


I've been playing around with layouts, but am not in a rush, so for now, I just took some pictures for comparison and stacked them all up again!

Straight HSTs:
Flying Geese:
ZigZag:
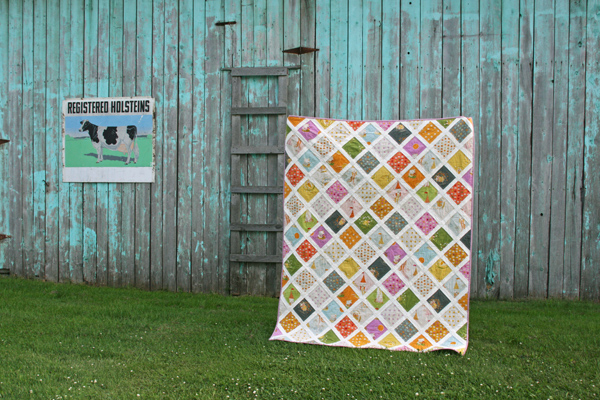
Diamonds:

If you were me, which one would you pick?

Monday, 5 July 2010

No-Plan-Bargello

I've been intrigued by bargello quilts for a while and always wanted to do one. Well, Rebekah of Don't Call Me Becky (and I always think out the "dot com" as well ;) showed a really neat one she saw at a quilt show. However, my 3D-thinking ability is not sufficient to figure out how that quilt was done with the traditional bargello method.


I don't do well with patterns (or recipes), and having read and been told how the bargello works in general, I just picked some fabrics (15 or so), cut 2.5" strips, sewed them together and joined the circle.


I also felt rebellious when I made this quilt, so I decided to join all the strips by sewing in the same direction - GASP! - not up down up down! I wanted to see if it's really as bad "as they say". It was certainly easier to match up all the selvedges...

I then started playing around with layout, but after I got this far (below), I just cut different width strips and decided if I wanted the wave to go up or down afterwards.


After very careful plan-less designing, I ended up with this: a gap! Argh, how did that happen?? I looked far and wide for the missing strip, but in the end I chalked the gap up to my being human (i.e. making errors) and fixed it but slicing a 1.25" strip off the wide one you say adjacent to the gap - that way I had an extra strip to complete the step.

Here it is, I'm quite happy with it! Again, not sure what I'll do with this. Maybe a baby quilt!


What about you, have you made a bargello before? Did you use a pattern?

Saturday, 3 July 2010

Hoot Hoot

I think I'm *slightly* obsessed with owls. My finger always hovers over the "add to cart" button when I see owl fabric, I recently won a pattern for a hand-sewn owl and I own a few owl prints, including this new one that came with the latest fabric order:


So when I started working on my "to quilt" list, based on some of the quilts I feel inspired by, I decided to begin with a baby quilt in a similar style to this one made by Anne of Film and Thread.

Interestingly, this quilt also inspired my Imagination 1 quilt - weird, I know!

The inspiration was obviously limited to the quilt not being symmetrical/mirrored in any way.

My version began like this, with whacky stacked coins :) I used all the bluish charms I had left from the MODA Love You charmpack after making the Green Love You quilt.

Next I tried to decide between putting a bird on the open space (like Anne did) or an elephant - for some reason I like elephants on fabrics as well.

But I noticed that one of the Love You prints has owls on it - Bingo!

I cut out the shapes on regular paper to see what it would look like.


Then I picked some patterns to match the charms, cut the shapes out with ~1/4" seam added. I didn't pin anything, just held the pattern in place and either used a rotary cutter or scissors to cut the shapes out - I'm not that fussy in some things, amazingly :)

Now it was time to see how to do the hand-applique, haven't done that since the soccer quilt and the apple worm quilt, really!

I thought this would be a good project for the bee, since I wouldn't have to lug my machine around. However, it's proven extremely difficult setting up a time to meet for 4 different people. Who would have thought... just four people ;) So the other night I started on this and ended up doing the entire owl while watching a good, serious movie called The Life Of Words.

I began attaching the black pupils to the white eyes using, I guess, the "proper" applique stitch. It looks messy on the back, and I didn't really like how that stitch worked with the rounded edge of a small (approx. 1" diameter) circle.


So I switched to the hidden stitching I use for the binding, liked that much better - and see how neat that looks!


Here you can see the look of the pupils. Admittedly, they look a bit messy partly because I clipped the edges, seeing if that makes the folding-under of fabric easier (it didn't).
You can also see that I didn't bother marking any seam allowances, ironing seams or doing paper shapes, I just placed, did the first stitch, and folded under - stitched - folded under etc etc :)


I finger pressed what looked like a scant 1/4" on straight or straightish seams like the wings and the big body shape.


And here we go, one owl coming right up :) It's on my knees, hence it looks all wobbly :)


I'm planning to embroider or quilt some claws on once I've attached the branch, and also give the little HootHootOwl some hairy ears ;) Funfunfun!!