Showing posts with label Love U. Show all posts

Tuesday, 14 September 2010

So Many Stitches

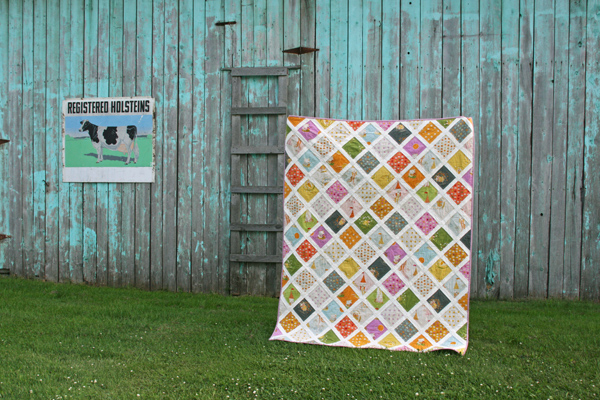
As promised, here's Finish #2, the Love U in green quilt. Concentric squares take a long time to hand-quilt, I found out. I don't know how hand-quilters do the intricate patterns (on traditional quilts), which must include thousands of stitches! (Hundreds of thousands? Millions?)

There's something about hand-quilting that just looks more traditional, isn't there???


Or maybe I just choose square quilt-patterns that I wouldn't do with free-motion (wobbly straight lines for me) or a walking foot (too much turning) machine quilting.

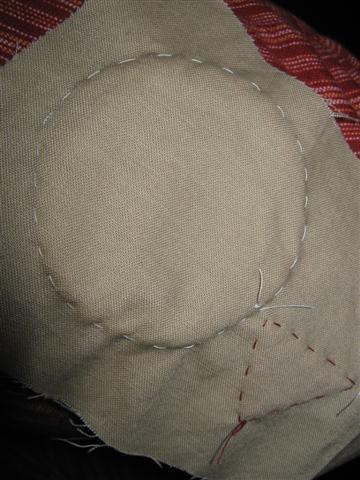
I find that printed flanelette on the back makes the quilting and any mistakes disappear, but you can see the pattern even on this small picture.


As mentioned, I did concentric squares in the solid green blocks. The prints are MODA Love U, I picked all the green and yellow prints and substitute a few from my stash to reach the right number.


For the border, I tried another stencil out of my collection - I'm usually more a fan of wavy lines, but the straight edges of this braid seemed to suit this quilt.


Now that I look at it on the photo, the briad reminds me of a strand of DNA ;) Such a science geek, hahaha!

I might yet stich in the ditch around the little yellow squares in the 4 corners, they look a bit lonely right now, and that wouldn't take too much effort.


Overall, despite taking quite a while (4 or 5 months, I think), I'm glad I hand-quilted this quilt and even more glad that it's done!


I won't even show you a picture of my pour right middle finger (the one that I use to push the needle through). My ring finger is starting to have the same hole in it, because I switched over when the middle finger was too damaged to touch a needle ;) It'll heal, and it better, because I still have about 3 circles to quilt on my BIG hand-quilting project, the Imagination 1 quilt, and that must be done for the quilt show! (Though I bet no one would notice a half circle in among all the concentric circles! So the pressure to finish is only moderate - apart from my pride!)

Soon, I'll be ready to baste and quilt the Filmstrip Cafe quilt, still debating quilting options. I might do parallel straight lines on it, as I've seen it on other quilts and liked it. Oh well, time for another anti-strep-throat pill, ugh.

Sunday, 12 September 2010

Two Finishes!

Well, I'm sitting at home with strep throat, bored out of my mind, so I managed to finish two quilts this week, and one of them hand-quilted, wahoo!

Today, I'll show you the machine-quilted one (won't have anything else finished in the next few days, so I've got to stretch this over at least two posts ;)

The only thing holding me up with my Hoot Hoot quilt was the lack of embroidery thread and needle. For how little I needed to do on this quilt, I didn't want to go and buy everything needed, but I was lucky enough to find someone I could borrow a needle and a foot of thread from! After that, it only took a day to get the claws and 'ear-hair' on the owl:


I basted the quilt that same afternoon.


Didn't have any hesitation deciding on the quilting, for some reason... sometimes the ideas just snap right in, other times I have to hum and hah for a few months, it seems.

I started with the owl, outlining the wings, body, face and pupils as I didn't trust all of my hand-applique to hold up during subsequent washes. I also quilted some feathers (the owl kind, not the decorative kind) on the body.


Next, I loopy-loop quilted all over the background. I learned that you have to plan carefully where to start if you don't want to cross lines and end up where you started WITHOUT having to go around the outside of the quilt first - puffiness alarm! I made it work somehow, but next time I'll think ahead ;)


Lastly, I outlined around the wonky stacked coins. That was a bit of a pain because I used a walking foot, so had to turn every 1/2" to 2". Luckily, it was a small stack of coins!


And here is the finished product!


You can even see the owl outline on the back (on the left in this pictures)!


This quilt was fun to make and I love the personal touch of my own applique shape. Maybe I'll make a series next, I'd love to make a giraffe and an elephant!!

Stay tuned for finish #2!

Tuesday, 31 August 2010

Hoot Hoot Greetings

I've finished appliqueing the owl to my Hoot Hoot quilt.

I'm currently searching for my big needles to embroider "ear hair" and claws. I'm getting a bit impatient to get going, so if I don't find them soon, I'll go and buy new needles.


Question for you: I also can't find my stash of embroidery yarn, do you think wool will do the trick or should I just go and buy some thicker yarn (embroidery or darning or whatever)?

Saturday, 3 July 2010

Hoot Hoot

I think I'm *slightly* obsessed with owls. My finger always hovers over the "add to cart" button when I see owl fabric, I recently won a pattern for a hand-sewn owl and I own a few owl prints, including this new one that came with the latest fabric order:


So when I started working on my "to quilt" list, based on some of the quilts I feel inspired by, I decided to begin with a baby quilt in a similar style to this one made by Anne of Film and Thread.

Interestingly, this quilt also inspired my Imagination 1 quilt - weird, I know!

The inspiration was obviously limited to the quilt not being symmetrical/mirrored in any way.

My version began like this, with whacky stacked coins :) I used all the bluish charms I had left from the MODA Love You charmpack after making the Green Love You quilt.

Next I tried to decide between putting a bird on the open space (like Anne did) or an elephant - for some reason I like elephants on fabrics as well.

But I noticed that one of the Love You prints has owls on it - Bingo!

I cut out the shapes on regular paper to see what it would look like.


Then I picked some patterns to match the charms, cut the shapes out with ~1/4" seam added. I didn't pin anything, just held the pattern in place and either used a rotary cutter or scissors to cut the shapes out - I'm not that fussy in some things, amazingly :)

Now it was time to see how to do the hand-applique, haven't done that since the soccer quilt and the apple worm quilt, really!

I thought this would be a good project for the bee, since I wouldn't have to lug my machine around. However, it's proven extremely difficult setting up a time to meet for 4 different people. Who would have thought... just four people ;) So the other night I started on this and ended up doing the entire owl while watching a good, serious movie called The Life Of Words.

I began attaching the black pupils to the white eyes using, I guess, the "proper" applique stitch. It looks messy on the back, and I didn't really like how that stitch worked with the rounded edge of a small (approx. 1" diameter) circle.


So I switched to the hidden stitching I use for the binding, liked that much better - and see how neat that looks!


Here you can see the look of the pupils. Admittedly, they look a bit messy partly because I clipped the edges, seeing if that makes the folding-under of fabric easier (it didn't).
You can also see that I didn't bother marking any seam allowances, ironing seams or doing paper shapes, I just placed, did the first stitch, and folded under - stitched - folded under etc etc :)


I finger pressed what looked like a scant 1/4" on straight or straightish seams like the wings and the big body shape.


And here we go, one owl coming right up :) It's on my knees, hence it looks all wobbly :)


I'm planning to embroider or quilt some claws on once I've attached the branch, and also give the little HootHootOwl some hairy ears ;) Funfunfun!!

Monday, 17 May 2010

Love U In Green

It's been one of those weekends, the type, where the quilting spark just strikes me full force, so I succumbed (with very little fighting) and whipped up two baby quilts, basted and 1/3 quilted a big quilt and put half the binding on another big quilt - and it feels GOOD! :)

Let me introduce you to baby quilt #1, the Love U in green.

I made it using charms from this charm pack by Moda (bottom right):


I started off similar to the Free As A Bird quilt (still in progress, still hunting for grey fabric for the last border, *sigh*), but I picked just green/yellow/white prints and paired them with solid green squares. I'm making this quilt as a hand-quilting project (same as the next one I'll introduce in a couple of days) so I wanted a simple design with not too many seams.


here are the squares pinned together into columns - it's a beauty how quick charm quilts are when you just sew patches together :)


Sometimes I'm lazy and instead of writing out labels to number the rows or columns, I just put pins into the top square to count the sets :)


I must have paid attention to my seams in this quilt, because I only ran into two problem situations with seams not quite matching up as I joined the columns together... yippee, it's a good day when... ("the seams match"; "the binding seams don't fall on a corner"; "the fabric dyes don't run"... :)

Here's the top complete.


And lastly, I picked some matching fabric for a quick border, I did the "interrupted" style again, it's a bit of work matching the corner pieces as I'm also lazy and don't bother measuring, I just eye-ball :) It all works out in the end!


This quilt is now basted with some nice flanelette as backing and ready for its first stitches. I'll probably keep it simple, with outlines of all or just the green squares and something fun in the broad border!

A very gender-neutral baby-quilt, don't you think? :)