Thursday, 17 June 2010

More Character Than I Expected

Time for a new quilt - again :) Nope, not that one, but one just like it!


When my mother visited me last fall, she saw the character quilt (see above) I made for a friend of mine and really liked the idea. So she wanted one for a friend of hers, who incidentally likes black and red together as well.


I got to use many of the same fabrics, e.g. the cheese fabric, skiers, dancers, coffee text and even the fabric that Ginny had sent me when I was searching for coffee-can fabric.
I went through all the same steps making the blocks, i.e. fussy-cutting the theme fabrics, adding black borders, then adding red borders of random thickness to get an offset effect on the blocks.


I was considering joining the Worshop in Progress over at Naptime Quilter, a fellow Canadian blogger, so I took quite a few pictures of the making of this quilt. The planning was already done, so I forgot to cover that part.


But I'm not sure I want to blog extensively about every quilt I make, from calculations to mishaps etc.


What do you think? Are you interested in the behind-the-scenes or are you someone who prefers to see the final product?


I did take some photos to show that quilts look fine even if things aren't perfectly lined up throughout the piecing ;)


Sometimes pieces are slightly different sizes or I didn't crop them down perfectly, but the next piece might just align perfectly again. I'm too lazy to square everything up more than once (just before joining rows), and generally just adjust as I go - unless my seams are off more than 1/8" - that much misalignment I can rescue :)


You may have noticed that I was working with paper labels to number my rows this time. I also pinned all the blocks per row together before heading to the sewing machine so nothing would get mixed up.


And wouldn't you know it? I mixed something up anyway! I'm amazed this happened, and I only caught it as I finished the last seam of joining all the rows. Two bare blocks together - that can't be! Horrible layout with all that dead space at the edge!


So out came the seam-ripper.


I'm sure there are many ways of ripping seams. If I don't care about the fabric, I'll do the slicer-method, setting the seam-ripper against the thread in between the fabrics and slicing right through it - there's a bit of danger of catching the fabric and tearing a whole, though.

Or you could carefully rip stitch by stitch in between the fabric, gently tugging them apart as the stitches release.

My preferred quick yet safe method is this: On top of the fabric, I rip every 5th or 6th stitch all the way along the seam as shown in the pic below. The I pull the fabric apart with my thumbs in between the layers and the rest of my fingers on the outside, such that my thumbs pull apart on the stitches that are a bit down from the start of my intact seam. The torn stitches will make each seam section come apart from both ends so the whole thing just plops apart.


Makes a bit of a mess though. You get one long thread from the back of your seam and 5-6 stitch-long pieces of thread from the front - they mostly get caught in the fabric and it's a bit tedious to pick them out.


So the funny thing about this was that as I had been sewing blocks together, I was thinking that it would be a pain if I put a theme fabric block in upside down, and that I'd have to figure out a way to switche just one block in the middle of the quilt and how I'd do that. Then I laughed at myself and thought "Just put them all in right side up!" and was at piece with myself. Little did I know that not 15 min later I had to do exactly that: switch a block. Luckily it was near the edge, so fewer seams to redo! I just took the two blocks that were switched out, but left them attached to each other and turned the whole pair around.


The fabric here was non-directional, so I could do that without now having trees with the roots pointing up!


And, as always: All is well that ends well ;)


Up next, the backing!

And today's special question: Do you have a cool way of ripping seams?

Tuesday, 15 June 2010

No Thanks

Side note: Ah, it's difficult to blog while the world cup is broadcast live on the web... this is the one time I wish I had two monitors :)


At a recent yard sale, I had some baby quilts with me and a lady approached me wondering if I could help her by 'fixing' two of her quilts. It turns out they were quilts that her late mother had made. One quilt needed the backing replaced since it was torn in several places and the other was only 1/3 hand-quilted and needed to be finished and bound.

I checked the quilts out and even did a bit of hand-quilting, but in the end, I decided against this job for a bunch of reasons, the biggest one being that the quilts were absolutely smoky. I had aired them out for over a week with no marked success. I really really hate cigarette smoke and was disgusted at my hands and clothes smelling like cigarettes after an hour of having the quilt on my lap.

This is the quilt that needed hand-quilting:

The flower petals are all hand appliqued, and some of the applique basting stitches are still in the petals.

The quilting is simply stitch-in-the-ditch around the sashing and around the petals.


The quilting stitches in the quilt were fairly large, and I wondered about that until I did one block. Light-bulb moment: the quilt is so thick, it's really difficult to make small stitches by rocking the needle up and down. The loft of the poly batting is quite high, and for some strange reason there are TWO backing sheets, one that feels like an old flanelette, the other a cotton sheet. Makes for a very heavy quilt and extraordinarily tough hand-quilting - my fingers suffered!


After basting the quilt, It took me an hour and a half to complete one block, and that meant that the quilting of the quilt alone would cost more than twice of what the lady was willing to pay. The binding would come on top of that! Aside from all that, the backing and batting materials are about 2" short of the quilt top at the other end. That would be a nightmare to deal with and still match the original fabrics. I really wanted to help this lady with her quilts since they mean a lot to her, but I just didn't enjoy working on the quilt. The green background fabric is either polyester or a poly mix, but not a fabric I like under my fingers...

The second quilt was made of massive half-square triangles using the green fabric and a make-believe pieced-looking multi-coloured fabric (is it legal to put that many hyphenated words in a row???).

The quilt is tied, not quilted and the binding is massive (you'll see farther down).


This is the quilt that needed the backing fixed because of the torn center.

The owner had a flanel bed sheet and wanted me to just put it on top of the old one and redo the binding around it. Sounded simple, but then how would the new backing be attached to the quilt in the middle? I'd have to either re-tie it or add some quilting, and that would involve many layers of fabrics to quilt through again. This quilt also has a second sheet inside the backing sheet for some reason.

Nope, not my idea of fun and relaxed quilting!

So I'm learning how to say no, quite a process, because I have this strange idea that I'm unhelpful if I say no. But I gotta do what I've gotta do, and besides being sensitive to the cigarette smell, I have a lot more fun projects on the go quilting-wise :) I dropped them off yesterday - no problem!

Sunday, 13 June 2010

Here You Go, Grandma

Thanks for your comments about my quiet blog. To my embarrassment, I realized that it hadn't actually been THAT long since the last time I blogged! ;) I guess what I meant was that I haven't been commenting on YOUR blogs as much as I like... I sometimes schedule posts if I had a really productive phase and want to spread the bloggy-goodness out a bit, so new posts might appear here even though I'm not actually active in blog-land - I'm sure some of you have noticed the sudden avalanche of comment replies :) well, that's the reason why!

Here's an update on actual quilting, as opposed to fabric splurging.

During a weekend trip a couple of weeks ago, I sewed the binding and wall-hanging sleeves on the animal quilt for my grandma (more about they reason behind this quilt here).


I put part of a pillow case I got at a second hand shop on the back, since no one will see that side anyway. I still have the duvet cover matching the pillow case and wanted to see how that fabric looks quilted. I had bought it originally to make a whole-cloth quilt out of it, for a really really fast quilt to relax in between the intricate ones. Then I thought maybe the fabric is too faded, but I think it's okay...


As you can see, I did a simple stitch-in-the-ditch for this quilt. I considered hand-quilting it, but I'm doing a lot of that these days it seems - another reason for the less frequent blog updates, I guess. So I opted for machine and simple instead.


Now, the binding... I hummed and hahed about this for quite a while. In the end I picked a fabric I really like, but I'm not so sure it goes well with the quilt...


It's almost too orangy, or too strong for it. I could ask your opinion, and I'd love to read it but you all know I won't take the binding off again :) But hey, maybe some of your opinion will mean I make a better decision next time. And who knows, maybe some of you like this binding?

As a side note - have you noticed how when any of us blog about a quilt WE think is ugly, no one ever agrees? The comments all read "No, it's lovely, send it to me if you don't like it!". I guess the people who agree that the quilt is ugly don't comment ;)
Boy oh boy, I'm totally setting myself up for comments a la "yes, that binding is horrid!" *LOL*

Friday, 11 June 2010

Quiet Blog

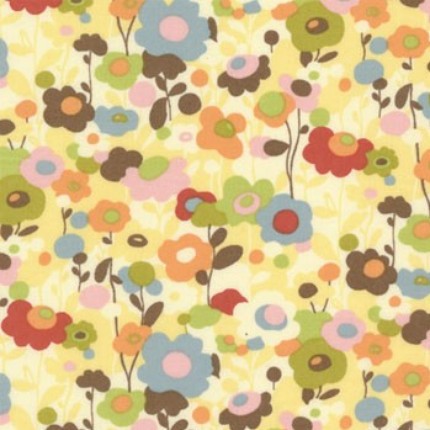
MoMo Wonderland Tweedle Dee Sugar

Ah, the days are gone when I had time to browse many blogs every day, write comments and reply promptly to comments on my own posts, let alone post like clock-work! Such is the life when a job involves field work and a busy summer season alternating with a dead-quiet winter season :)

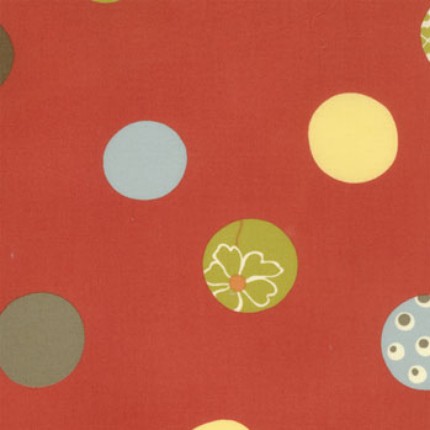
MoMo Wonderland Rabbit Hole Tomato

I did however have time to put in some fabric orders that I'm really excited about. I've been working quite a bit on my Moda Wonderland baby quilt with the Irish Chain pattern - the border is almost done!

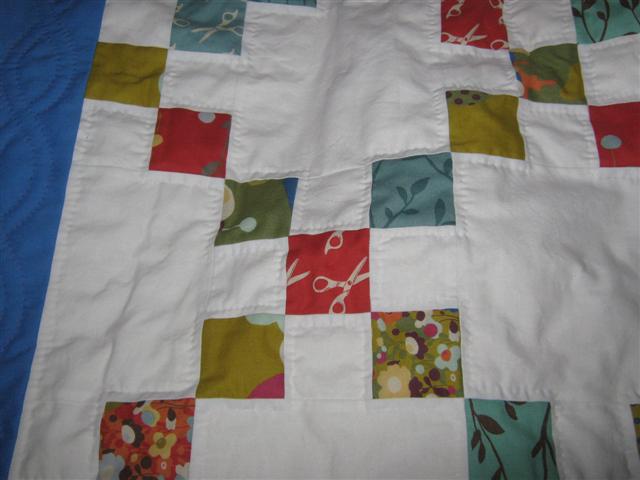
MoMo Wonderland SnipSnip in sky

Probably because I've been looking at Wonderland fabric a lot that way, I'm craving more quilts with those prints, so I've been searching Etsy and had success.

MoMo Wonderland some kind of print

All those Wonderland prints in the pics above will find a home with me soon, plus some different colour ways if they were available!

MoMo Wonderland Tweedle Dum Tomato

Aaaah, Wonderland! So beautiful...

I read that it's out of print, but has been re-printed. Some posts will sell the original prints for 7.50$ and up per FAT QUARTER!!! Insane! I'm not sure if there's an actual difference between originals and reprints - I'd probably not spot it!

MoMo Wonderland Rabbit Hole Sugar

MoMo Wonderland Pepper in Tomato

Not only that, but of course I found OTHER fabrics I wanted as well!

Freebird Garden Sky

It's just like grocery shopping - especially without a list. I never come out with just the 3 items I needed...
Freebird Balls Nest

Besides the Freebird fabrics above, I also found these treasures:

SEI Triangle Line in Nutmeg

Odyssey Athena Flowers

Michael Miller Whoos Hoot Owls in Olive

I ordered all the above prints from spiceberrycottage and buttercuppityfabric and both were great in responding to my querries, stuffing envelopes full of fabric to the max to save on shipping and setting up custom listings. Now the packages are on their way - that makes checking for mail so much more exciting!

I also bought these batiks - 4", 5" and 6.5" squares pre-cut, that'll be so convenient and the prices were absolutely decent! Purchased at materialgirlchic!


Happy Quilting to me, eh??? To you, too!

What's your favourite out of all my purchases???

Sunday, 6 June 2010

Border Decision

Well, I've completed the full circle!

A couple of ladies in my quilt guild connected me to a local choir when I was looking for a fun and relaxed little choir to join, now I've met the sister of one of the choral singers, and said sister used to be president of my quilt guild.

I mentioned to her that I was interested in trying some plastic stencils for hand-quilting borders and two days later, she loaned me some - great! I didn't want to spend 10$ on a stencil (that's what they cost at the local stores) without ever having tried one, so this works out wonderfully.

I tried one right away on the border of the Wonderland Irish Chain baby quilt:


See the double winding braid on the blue border?

For the center of the quilt, I'm just outlinging white spaces about 1/4" in from the seams right now. About 1/4" because I'm just eye-balling :)


If the border stencil works out, I'll try a center piece stencil for the white space, or maybe something free-hand. I'm loath to mark the white area though, as I haven't tested my chalk, chalk pencils and marking pens on light coloured fabrics yet... It's just like washing a quilt for the first time ever, and I just am not really the 'testing' kind of person... I also don't test cremes etc on an "inconspicuous area" first, just lather it on and hope for the best or have a funny story to tell a few years down the road.

But seeing how many hours I've spent quilting this quilt already (that's about 1 hour's worth of border you see up there!!), I don't want to ruin it by using a bad fabric marker, so I guess I can take some fabric, mark it and see if the marker comes off again... sigh. So out of my element!

Friday, 4 June 2010

Another One Like This!

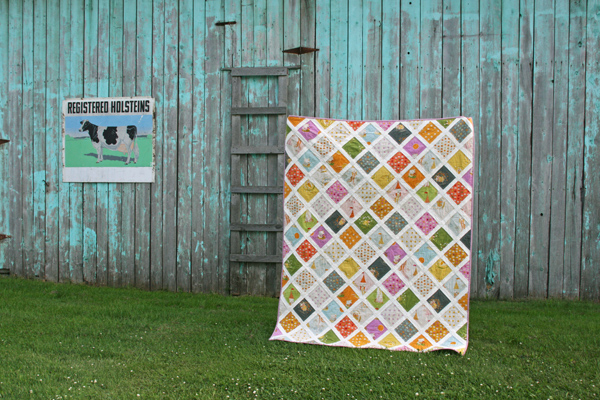
This is the quilt I made last summer for a dear friend of mine - it's her therapeutic bird quilt (all birds in the diamonds) and she says she's making some progress on the hand-quilting (it's her first attempt at hand-quilting! I'll see her in July and am curious to see how she's getting along after my impromptu, middle-of-vacation/road-trip 30 min quilt lesson :)


So, this winter, I visited my grandmother and showed her my quilt album - photos of all the quilts I've made to date. There was lots of hmming and hahing and "no, I don't like that one" - she's a very VERY honest grandmother ;)

Until she came to the quilt above, suddenly there was a gushing of "Now that quilt, that's nice, I really like that, you can make me one just like it!"

With an added "Except that blue doesn't go with my wall-paper..." Guess I can make a bet on where that quilt will be going :)

So, last week I got down to business and made her a copy of the quilt, with background and border that matches her wall-paper and some non-bird fabrics to replace the very dark blues "that don't go with her wall-paper at all" :)


The border is made of the same fabric I used for my summer purse - I bought it ages ago and it makes me think of summer and my childhood (I must have been under 10 when I bought it - without any idea what I'd use it for...)


In addition to various birds, I've included mice, bugs and frogs - I think what my grandma liked most about this quilt was that it was scrappy!

And grandmas hillarious? The stuff that comes out of her mouth... I've forgiven her for dissing all my other beautiful quilts :)

Wednesday, 2 June 2010

Free As A Bird Progress

Okay, so as I've been moaning and groaning about, I was out of grey fabric for my exciting Free As A Bird quilt...


Luckily, I went to another Fabricville last weekend and came back with a big haul of fabric (I ONLY wanted to buy 1.5 m of grey, but it just so happened that the solids were on sale


because the fabric was so cheap, I also ended up buying ALL the grey they had left (5 m or so I think, plus a couple of pieces).


I see many beautiful quilts in the future of this bolt :)

The reason I ran out of the grey originally is this: I told you that the quilt wouldn't look anything like the original picture (above) ;)

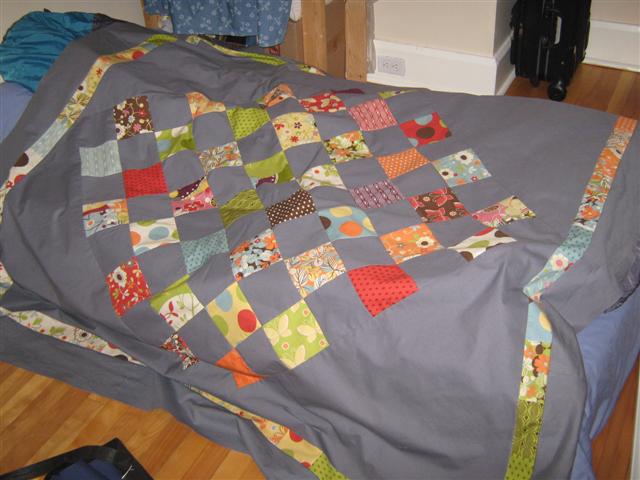
Well it doesn't, because I decided to set the center piece on point. Meaning, I needed very large grey triangles.


Isn't it gorgeous??? I made the border out of the left over charms and ordered them by colour to get a smooth transition between colours.

I cut that strip in half and put it around my quilt center.

The first picture has the left over grey fabric lying around the quilt border to see what it would look like with that colour arrangement. Well, I liked it, but because I cut the large grey triangles, I was left with strange small triangles of grey fabric, not enough to make all the necessary borders out of. There I thought I had bought so much fabric when I got several yards of the grey initially! Hah! Anyway, that problem is now solved, and I put the grey borders on last night.

Oh, I can do better than that, no? You can't even properly see the pattern!

Let's try that again:


I want to do some kind of coooool quilting in all the grey space. Something like Diane Gaudynski's quilting - well, an amateur version of that.. (see bottom blog roll). Though I think I should actually, for once in my life:

a) practice
b) mark my quilting lines with some kind of pen
c) practice some more
d) use a fresh needle
e) check my tension before I start

:) Anyone want to lose some money and bet that I'll do the above? But I'm starting with the best of intentions!!! Let it be recorded here :)