Saturday, 20 June 2009

Visit At The Quilt Guild

Finally, after months of having conflicting appointments, I've managed to attend a quilt guild meeting in town. It happened to be the last before summer break, phew!

We had a pot luck and a show and share where some people showed us their quilts and home-made bags and explained a bit how they made them or why.

I showed my pink quilt, the baby wheely quilt and the baby pink zig zag and they were all well-received. Some people commented how wonderful it was to have a young quilter among them - I was the youngest by about 10-60 years :)

Here are some impressions:

This table was for a competition they had started in January, about who could finished the most UFOs. Participants sent in photos of the UFOs and in June, the finished objects were tallied. There was a prize for most finished objects (7), most UFOs to start with (23) and the UFO that took longest to finish (60 years, a 4H project started in 1949).

The outgoing guild president (in purple) received a box full of batik blocks in this pattern as thank you. Here they are laid out on the table.

Some other Show and Share items

There were three vendors selling fat quarters - I refrained successfully!


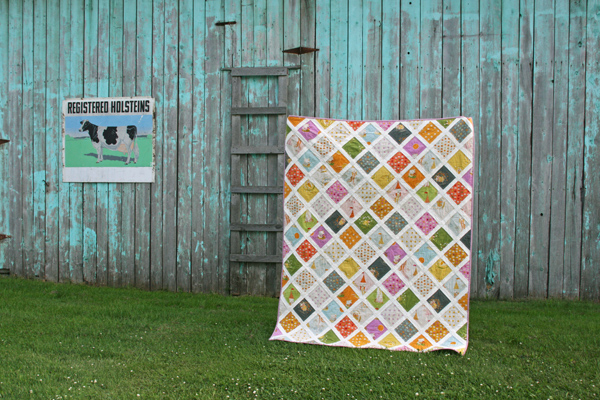
My quilting teachers from last year were at the guild meeting and helped me hold up the pink quilt properly, here it is, the first full view of it!


So, unless I have a conflict of time again in September, I will join the guild at the first meeting. It was a lot of fun to see everyone's work.

Friday, 19 June 2009

Interrupted Borders on the Northern Solitude Baby Quilt

Remember this quilt???


I was so excited when I found a MODA charm pack at my local quilting store, I bought it. I decided to just turn it into a simple patchwork baby quilt, and it's been sitting, fully assembled, on a storage rack ever since early May.

Tuesday, I got home feeling blah and lethargic.

There was a pile of dishes to do, dinner to cook, and I didn't want to do any of it. So I started working on the bento box wedding quilt, because I really HAVE TO! The wedding is on July 4th. I admit I don't really like the pressure of a quilting deadline, but it was my own choice to make a wedding quilt in a month.

It was actually okay, quilting got me enthusiastic for just about everything else! After a couple of hours of working on borders for the quilt, I dug out the Northern Solituded [previously referred to as Wildflower Serenade] quilt and chose borders for it. Tricky business, as I didn't have any matching MODA fabrics.

I found a light blue and patterned green in my stash that I liked in combination with the quilt. I changed my mind three times about the border design, and am really happy with what I settled on!

I'll call them interrupted borders :) The blue strip is 1" finished, the green amoeba (as I think of this fabric as) border is 3.5" finished.

I learned from my Wheely Quilt and thick seams, so I pressed the seams around the little 1" square flat.


So in total, this quilt consists of a 35 piece charm pack, with 1" solid inner border and 3.5" green outer border. That brings me to my normal baby quilt size of approx. 30x40". I've got a rose-coloured flanel picked out for the back, which I guess delegates this quilt to the baby girl pile, but it's such a nice colour and matches the rose on the front, so the decision is made!

I'll be working away on this quilt whenever I get sick of bento boxes :)

I actually have a feeling I might hand quilt this one!!!


PS: oh, by the way - working on these quilts on Tuesday re-energized me to the point that I did dishes, made a casserole and baked cookies for a pot luck at the quilt guild, so thanks to quilting for keeping me going on a blah day! Does quilting ever do this for you??

Thursday, 18 June 2009

Pink Quilt Done, Hooray!!!

Hooray hooray hooray!

I spent 2 hours Tuesday night binding the last side and a half. 7 meters binding in total, phew!
I wanted to get it done before my first quilt guild meeting Wednesday night, for show and tell.


It's big :) though barely big enough for a double bed (i.e. not a lot of overhang).

I love how the quilting looks on the back - some people who've seen the quilt thought it was a log cabin pattern at first glance.


My funky border - I love love love the buzzing-bee-line I quilted along the edge.


I'm very happy with this! Those of you who've followed the whole process of the pink quilt, what do you think about the final result??

Wednesday, 17 June 2009

Tutorial: Wheely Baby Quilt

My Wheely Quilt is done!


Here's how I did it:

I started with a fat quarter package containing 8 fat quarters from the Timeless Treasures series. I picked unbleached cotton for the background. Cut 4 3/8" (=4.375") squares for the half square triangles.

For the background, cut 24 [4"] squares and 36 [4 3/8"] squares.
Of the six wheely fabrics, cut 4 [4 3/8"] squares each.
Of the center squares fabric, cut 4 [4 3/8"] squares.
Of the triangle-around-the-edge fabric, cut 8 [4 3/8"] squares.

This should give you 36 colour [4 3/8"] squares and 36 unbleached cotton [4 3/8"] squares.

Mark two diagonal lines on the unbleached cotton [4 3/8"] squares, each 1/4" from the center diagonal. Pin these marked squares to all the pattern fabrics, right sides together (marked side up on the unbleached cotton).

Sew together along the lines.

Cut each square in half between the seams.


Press the seams.


Trim the corner overhang.


Lay out your wheelies like this and start sewing squares together.


Decide on a final layout and sew blocks into rows and rows together to complete the quilt top.


Measure your quilt (it's around 28x42") and add 1-2" on all sides for the backing fabric. I used left over pieces from the top and made a strip to divide the solid backing fabric.

Decide on your binding colour and cut enough 2" strips to go around the edge of the quilt plus about 16" for corners and the end joint. 2" makes a tight binding, feel free to use 2 1/4" or 2 1/2" if you're more comfortable with that. Join the strip on the diagonal (sorry, no pics) - basically, lay the ends of two strips perpendicularly on top of each other so that they form a corner, sew diagonally across so that when you lay the seam out flat, you have a straight strip. If you lay your strips out like an L-shape, the diagonal seam goes top right to bottom left.


Tape or pin the quilt backing to the floor face down, make sure it's flat and taught, but not stretched. Cut batting to the size of the backing, at least 1-2" bigger than the quilt top, smoothe it out on the backing fabric and add your quilt top. Pin from the middle out, to each side, to the top and bottom, to each corner, then fill in the slices in between with pins, always from the middle out. Keep smoothing out your quilt top as you go along and make sure it stays on straight, not pulled and warped. Pin every 4" or so, your hand should hit at least one pin wherever you place it on the quilt.

Quilt to your liking, by hand or machine. I use an old Singer machine, it does straight and zigzag stitches, very simple. Using a walking foot that moves fabric from the top and the bottom to avoid pulling only the bottom fabric, I roughly outlined the wheelies and squares/triangles in the center and along the edge.


Then I used a darning foot (with the feed dogs lowered, in my case, removed) to stipple the background.


Here's the result on the back:


And the front:


I used the walking foot to sew the binding along the cut edge to the top of the quilt, mitre-folding the corners, and hand-sewing it to the back, of course using the invisible ladder stitch, my all-time-favourite.

Voila!

Friday, 12 June 2009

My Week In Brief

A whole week without any quilt photos, that's just not right!

I thought for once, I would finish a quilt before posting about it, so what I'll give you here is just a little pre-view of my week's worth of work, and I was hard at it.

Another baby quilt, I call it the Wheely Quilt :)

As you can see, I didn't just stipple it! I wanted the wheels to pop out, and I think my quilting worked quite nicely for that.

It's going to come with me this weekend for the binding part and securing the loose threads.


Also, I am getting near the end of my wedding quilt and have been busy working on a massive tutorial about how I made it! It'll be there by July, that's for sure!


Lastly, I failed my next step at Fabric Shoppers Anonymous and am back to simply acknowledging that I am addicted to fabric. I forget who it was that mentioned the fat quarter shop, I wish you hadn't! (No I don't!) After an initial shopping cart of over 100$, I managed to triage back to my favourites, including these selections from the Apple line by Timeless Treasures, plus one example of a Kaffe Fassett fabric that caught my eye (bottom right).


My fabric shopping record so far seems to indicate that I love Moda and Timeless Treasures! Good to know for my next shopping sprees.

I also got another meter of my favourite sheep fabric at GotFabric.com


They only sell one meter at a time as it is on sale, otherwise I would buy all of it (only 2m remaining).

Oh, and my pink quilt will be finished this weekend, that's the goal! Then I'll take some photos of the whole thing in all its glory - well, as soon as the rain stops.

Happy weekend to you all!

Thursday, 11 June 2009

Genome Quilts!!!

I had to share this with you as I'm a science person so I love the combination of science and quilting. What a wonderful idea: using half square triangles to resemble the four nucleic acid bases found in DNA (A, T, C and G) and then encoding genes in quilts by stringing the HSTs according to the gene sequence.

Here's a link to the Genome Quilts website - check it out, the quilts turn out beautifully!

It reminds me of a Skandinavian exhibit at the World Exposition in 2000. I don't remember which country it was (Sweden?), but what they did was take annual rainfall data in their country, graph it, and then translate the graph onto music sheets and play it. It sounded beautifully!

Some people are so creative, and I bet Mal of turning*turning has something to say about this? :)

Cheers,
Christine

Wednesday, 10 June 2009

Another Quilting Question

First of all, thanks for all the great tips on fraying fabrics. I don't have pinking shears, but might give those a try, because unfortunately, even after hundreds of meters of fabric, I'm still a staunch pre-washer and ironer. I was everything to avoid not only running fabrics, but also shrinkage and to get any chemicals out that the materials were treated with. I've been told that clothing is usually treated with chemicals and should be washed before wearing it the first time to avoid sensitization. It's probably a rare case, but having clean fabric that smells like fresh laundry is nice. And I love the ironing (especially smaller pieces, ironing 5m of backing fabric is no fun at all) - it gives me a chance to look at the fabric again in more detail.

So, to my new question:

I'm working on a baby quilt made of triangles (first time working with triangles, really). Photos to come this week, promise!! I'm having fun with this one and it's coming along quickly.

My only question so far is, when you sew 4 squares made of triangles (HSTs they're called, I think) together so that all the tips meet in the middle, it's a pretty decent lump of seams. I ironed the first seam in the HST toward the dark fabric, and still did the iron-to-one-side on the first set of squares I sewed together. Should I have ironed it open? You'd still have the same number of layers in the end, I guess.

Will this be a problem when I quilt and should I just avoid those lumps? If anyone has a tip, I'd love to incorporate it now before it's too late!