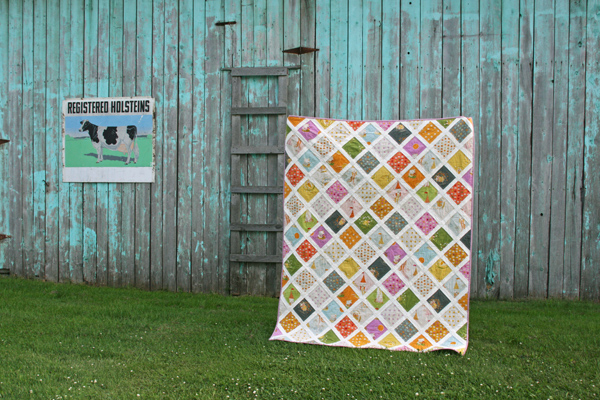
Tuesday, 3 March 2015

Pluses galore

I've seen plus-quilts (sometimes called crosses instead of pluses) all over blogland and decided that this would be great pattern to showcase a bunch of Moda Wonderland fabrics I bought ages ago.
I liked one blogger's design of having one reverse plus in the pattern, to shake it up (see here http://kindaquilty.blogspot.de/2014/09/finish-it-friday-final-purge.html). Most pluses will be a wonderland print on blue background, except the one you see here on the bottom.
A couple of days after, I now have a huge pile of block components ready to sew into 30 plus-blocks. 
I'm already looking forward to free-motion-quilting all this background space!

Wednesday, 4 February 2015

Warm and fuzzy corners

I've decided on a design for the corner triangles of the Warm and Fuzzy quilt.


I've also finished the binding and did a single line of hand-quilting in the middle of the black border (it's a bit wobbly at times, but I did it spontaneously while visiting my grandma in hospital, so it's connected to a personal story for me and not a flaw).

With all that, I now declare this quilt... finished!
And once the sun comes out, I'll take some photos of the entire quilt!

Thursday, 15 January 2015

Inspiration

This would make such a lovely quilt pattern! It's wrapping paper, and someday I'd like to turn this into an applique quilt...


Saturday, 10 January 2015

Galactic finish

These were actually done ages ago, this past summer. But alas, time flies, and too little of it is used for blogging :)

I have some semi-finished plans to give two of these away instead of hanging them as a triplet wall-hanging. We'll see if these plans pan out. Enjoy these photos of the quilting. It was so much fun making these and playing around with free-motion quilting.


They finish at 16.5 x 22".

Monday, 5 January 2015

Fabric bins

used this easy tutorial to make my very first fabric bin. 


Since I couldn't find my iron-on lining stabilizer stuff (Pellon-equivakent), I used batting and quilted all over the place. It's not super sturdy, but I don't have any comparison of what it would be like with the Pellon... and it stands up without problem, so the bin works for me.

Now I gotta figure out what to put inside... :-)

Thursday, 1 January 2015

Heisenberg

Happy New Year!

My partner and I watched the series Breaking Bad a few months ago and were big fans. As a memory, I made him a mini-quilt with the silhouette/shadow-face of "Heisenberg".

I started by googling images online but ended up having to piece together two images, one for the face and one for the hat. I traced these images right off the computer screen onto some tracing paper.

Then I thought: "How the heck do I get this onto fabric now???"

Luckily, I remembered some fantastic posts I've seen in the past, about sewing right through the paper. So that's what I did.
 

First I sewed the outline of everything, then I started filling in the shaded bits.


After that: time to pick out all the paper. Some fiddly small pieces! But they come off so easily after being perforated by the needle.


I cut out the shape of the hat and machine appliqued it on top of the hat, then framed the whole thing slightly off-center with black binding.


Here some close-up shots:


And here's the back. I put loops into the corners (just out of some ribbons that I cut out of T-shirts -- those that stores use to hang T-shirts up, but which always poke out of the neckline when one puts the shirt on, so definitely needs to be removed in my household!) so that it could be hung up on a wall or pin-board easily.


I forgot to measure it, but it's roughly 6" x 8".

Sunday, 28 December 2014

Tea Time

Today I am sharing a commissioned work with you. It's a cover for a lidded stove, 2 by 2 feet finished size. The lady who ordered it provided the fabric (which is not quilting weight cotton but a heavy cotton weave --- this made it tricky to work with, because it frayed terribly, but it was lovely and smooth to quilt). She wanted a kitchen theme on the cover.

I started by browsing the internet for tea cup and a tea pot shape, which I printed and traced onto thin paper. I then cut out blue fabric in those shapes and used a zigzag stitch around the edges to apply the shapes to the quilt top.


I quilted the details from the tracing paper with contrasting thread. This gave the shapes some nice dimensionality, too.


To make things easier, I did not cut the thread till the end and just hopped from spot to spot.


Here's a view of the back.


I quilted some steam coming out of the tea pot (the first layer was in matching beige thread, but you can just make it out here.


With the same beige thread, I filled the background. I thought about tearing out some of the wavy lines right down the center and redoing them to get better perspective, but in the end, it was not worth the effort, so I left it this way.


I added some blue thread to emphasize the steam coming out of the tea pot and used proper quilting weight cotton in matching blue for the binding (just attached to the front in this shot).


Here it is all sewn down by hand (possibly my favourite part of quilting)...


And here's the back, including the label, of course!


It was a fun little project, though I once again noticed that I prefer non-commissioned work. I can do what I want without wondering whether the customer will like it, and there's no deadline!